Содержание
Этап 8: Окончательный код для ATmega328
Ниже приведена программа модуля Arduino, которая написана для совместной работы датчика отпечатков пальцев и ЖК-дисплея. В текст программы вставлены комментарии автора, чтобы было понятно, зачем какая-то часть кода нужна, и не возникало много вопросов.
После того, как код для ATmega328 будет загружен, собранное устройство сможет работать как часы!
Код для ATmega328:
/**
 *FPSGarageDoorOpenner
 */
#include "LiquidCrystal.h" //for the screen
#include "FPS_GT511C3.h" //the fps (fingerprint scanner) library
#include "SoftwareSerial.h" //used by fps library
//Setting up the pins for the LCD and the fps
LiquidCrystal lcd(2, 3, 4, 5, 6, 7, 8); //pinouts for LCD
FPS_GT511C3 fps(10, 11); //RX, TX
boolean isFinger = false; //true if the fps detects a finger on the scanner
//output pins
const int buzzerPin = 13;
const int backlightPin = 9;
const int attinyPin = 12;
const String idNames[] =
{
  "self","Bro", "Ryan", "Mom", "Dad", "Auntie", "Grandma", "Zeide", "Person", "person", "Thumb"};
void setup(){
  //set outputs
  pinMode(buzzerPin, OUTPUT);
  pinMode(backlightPin, OUTPUT);
  pinMode(attinyPin, OUTPUT);
  //for debugging
  //Serial.begin(9600);
  fps.UseSerialDebug = false; //set to true for fps debugging through serial
  //initializing the libraries
  lcd.begin(16,2);
  digitalWrite(backlightPin, HIGH); //the LCD backlight
  fps.Open();
  fps.SetLED(true); //the fps LED
  //boot up sound
  for(int i=0; i<30; i++){
    tone(buzzerPin, 50+10*i, 30);
    delay(30);
  }
  tone(buzzerPin, 350);
  //print starting message
  lcd.print("Put your finger "); //the command to print to the LCD
  lcd.setCursor(0, 1); //sets the cursor to the 0th column in the 1st row
  lcd.print(" on the scanner ");
  delay(150);
  noTone(buzzerPin); //stops the startup sound
}
void loop(){
  //scan and identify the finger when one is put on it
  waitForFinger();
  lcd.clear(); //clears the screen and sets the cursor to 0,0
  fps.CaptureFinger(false); //captures the finger for identification
  int id = fps.Identify1_N(); //identifies print and stores the id
  if(id <= 10){
    lcd.print(" Access granted "); //success message
    lcd.setCursor(0,1);
    //prints name when the garage is opening
    String message = "  Hey " + idNames[id] + "!";
    lcd.print(message);
    tone(buzzerPin, 262, 1000);
    delay(1500);
    //sends a signal to open the garage door
    digitalWrite(attinyPin, HIGH); //first pulse syncs the delays (10ms)
    delay(5);
    digitalWrite(attinyPin, LOW);
    delay(3);
    digitalWrite(attinyPin, HIGH); //next two open the garage
    delay(15);
    digitalWrite(attinyPin, LOW);
    delay(5);
    digitalWrite(attinyPin, HIGH);
    delay(10);
    digitalWrite(attinyPin, LOW);
    delay(1000);
    lcd.clear();
    lcd.print("Don't forget to ");
    lcd.setCursor(0,1);
    lcd.print("  shut me off!  ");
    delay(2000);
    waitForFinger(); //tap to continue to enroll
    while(true){ //save a new fingerprint
      //prints message to lcd
      lcd.clear();
      lcd.print(centerText("So you want to"));
      lcd.setCursor(0,1);
      lcd.print(centerText("scan a new one?"));
      delay(2000);
      //Copied and slightly modified from the enroll example:
      int enrollid = 11;
      //choosing which id to overwrite/create
      //release your finger when you want to write to the id/name printed on the screen
      waitForFinger(); //waits for the fps to be pressed
      while(enrollid==11){
        for (int i = 1; i<=10; i++){
          if((fps.IsPressFinger() == true)){
            lcd.clear();
            String str = "ID " + String(i) + ": " + idNames[i]; //concats a string w/the id
            lcd.print(centerText(str));
            delay(1000);
          }
          else if(i>1){
            lcd.print(i);
            enrollid = i-1;
            break;
          }
        }
      }
      //warning if there is already data in this id slot
      if(fps.CheckEnrolled(enrollid)){
        lcd.clear();
        lcd.print(" Warning! ID #");
        lcd.print(enrollid);
        lcd.setCursor(0,1);
        lcd.print(" has data. OK?  ");
        delay(2500);
        waitForFinger(); //waits for the fps to be pressed
        fps.DeleteID(enrollid); //delete data
        delay(100);
      }
      //Enroll
      fps.EnrollStart(enrollid);
      lcd.clear();
      lcd.print("Place finger to ");
      lcd.setCursor(0,1);
      lcd.print("enroll #");
      lcd.print(enrollid); //prints id that is being enrolled
      waitForFinger(); //waits for the fps to be pressed
      //captures the finger and saves to memory three times for accurate data
      bool bret = fps.CaptureFinger(true); //high quality pic for enrollment
      int iret = 0; //error stuff
      if (bret != false){ //first enroll
        lcd.clear();
        lcd.print(" Remove finger  ");
        fps.Enroll1();
        while(fps.IsPressFinger() == true) delay(100); //waits until no finger
        lcd.clear();
        lcd.print("  Press again   ");
        waitForFinger(); //waits for the fps to be pressed
        bret = fps.CaptureFinger(true);
        if (bret != false){ //second enroll
          lcd.clear();
          lcd.print(" Remove finger  ");
          fps.Enroll2();
          while(fps.IsPressFinger() == true) delay(100);
          lcd.clear();
          lcd.print("Press yet again ");
          waitForFinger();
          bret = fps.CaptureFinger(true);
          if (bret != false){ //third enroll
            iret = fps.Enroll3();
            if (iret == 0){ //checks to see if there are any errors
              lcd.clear();
              lcd.print("    Success!    ");
              delay(2000);
              beep(); //shuts arduino off
            }
            else{ //if the enrollment fails in any way
              lcd.clear();
              lcd.print("Fail. Try again ");
              delay(1000);
            }
          }
          lcd.clear();
          lcd.print("   Failed 3rd   "); //error on 3rd
          delay(1000);
        }
        lcd.clear();
        lcd.print("   Failed 2nd   "); //error on 2nd
        delay(1000);
      }
      lcd.clear();
      lcd.print("   Failed 1st   "); //error on 1st
      delay(1000);
    }
  }
  else{
    lcd.print("Fingerprint is"); //if print isn't recognized
    lcd.setCursor(0,1);
    lcd.print("   unverified   ");
    delay(2000);
    lcd.clear();
    lcd.print("Please try again");
    lcd.setCursor(0,1);
    lcd.print("Use your pointer"); //I scanned everyone's pointer finger
    delay(500);
  }
  delay(250);
}
void beep(){
  //beeps in hopes of someone closing the case
  lcd.clear();
  lcd.print("Please close the");
  lcd.setCursor(0,1);
  lcd.print("     case!      ");
  for(int i=0;i<8;i++){
    tone(buzzerPin, 262, 500);
    delay(1000);
  }
  delay(5000); //wait for someone to close the case
  //if no one does, shut everything off
  lcd.clear();
  digitalWrite(backlightPin, LOW);
  fps.SetLED(LOW);
  while(true) delay(10000);
}
void waitForFinger(){
  static int timer; //contains timeout counter
  timer = 0; //resets the timer everytime this function starts
  while(!fps.IsPressFinger()){ //timeout of eight seconds
    timer++;
    delay(100);
    if (timer>=80 && !fps.IsPressFinger()){
      beep();
    }
  }
  timer = 0; //resets the timer everytime this function ends
}
String centerText(String s) { //centers text on the LCD to look better
  while(16-s.length()>1){ //if the text needs to be centered
    s = " " + s + " "; //creates space on both sides evenly
  }
  return s;
}
FPSGarageDoorOpenner.ino – СКАЧАТЬ
Этап 9: вырезание крышки на 3D принтере
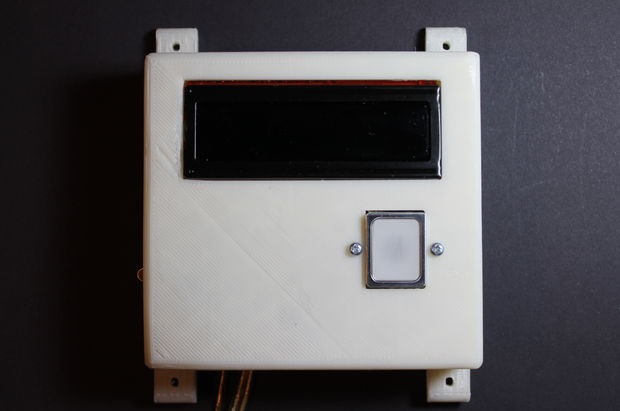
Чертежи крышки сканера выложены в файлах:


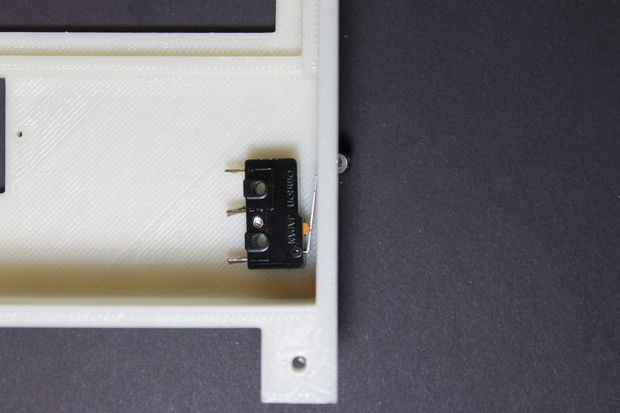
Включается сканер, когда внешнюю крышку снимают вверх, освобождая концевой выключатель. Как видно на фото, у концевого выключателя подключены провода к среднему выводу C, а также нормально замкнутому NC.
Окончательно все собранные платы приклеиваются к крышке силиконовым клеем. Микровыключатель должен располагаться в крышке под небольшим наклоном, чтобы его легче было нажимать.

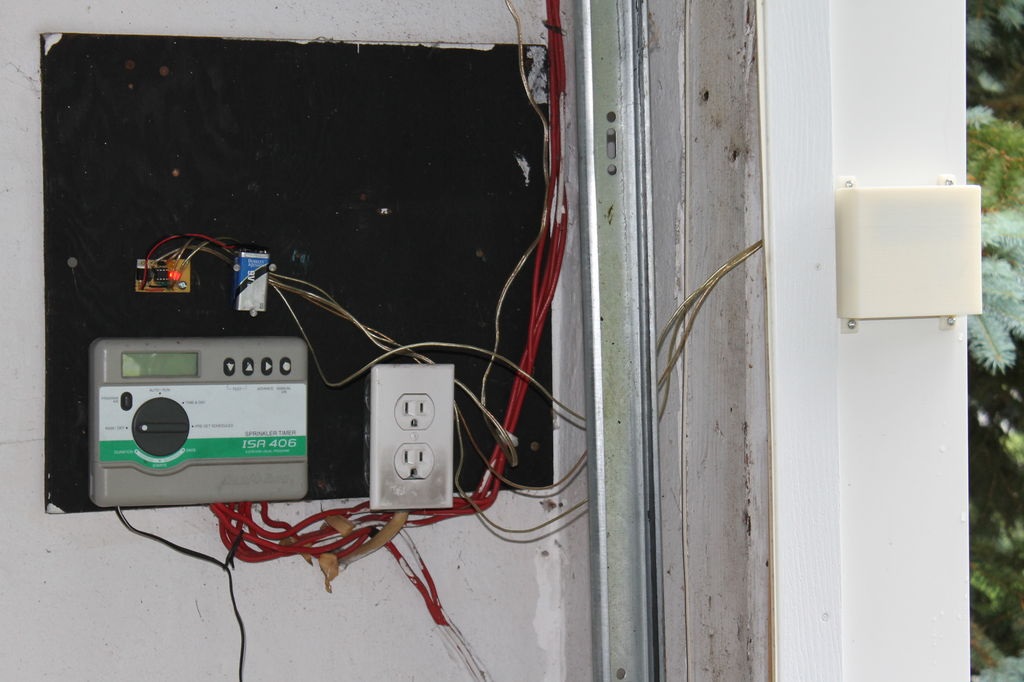
Этап 10: Подготовка гаража

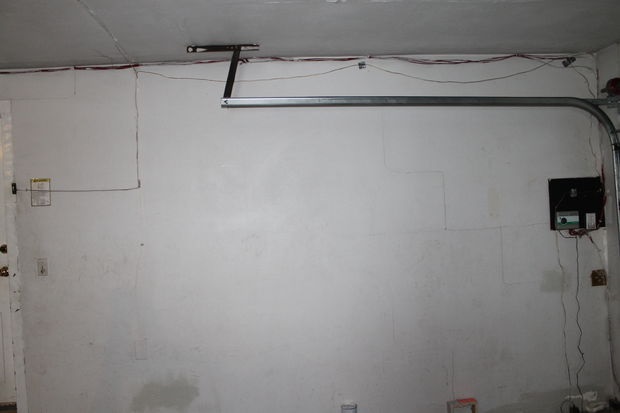
Открываются подъемные ворота гаража от управления ATtiny85 так же, как при помощи обычной кнопки. Только вместо того, чтобы физически замыкать контакты, ATtiny дает команду на открытие NPN транзистора.
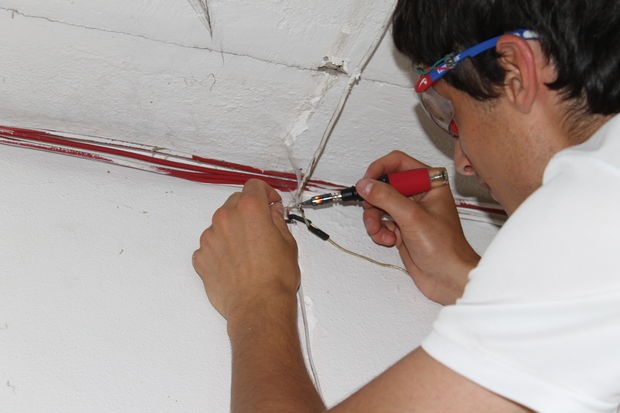
В первую очередь нужно отмерять провода по длине от устанавливаемого сканера до привода гаражных ворот, взять с запасом на длину ладони и отрезать. Затем кропотливая работа: припайка проводов от привода ворот к сканеру отпечатков пальцев (есть наглядные изображения в виде анимации GIF). Провода нужно замотать изоляционной лентой в несколько слоев.

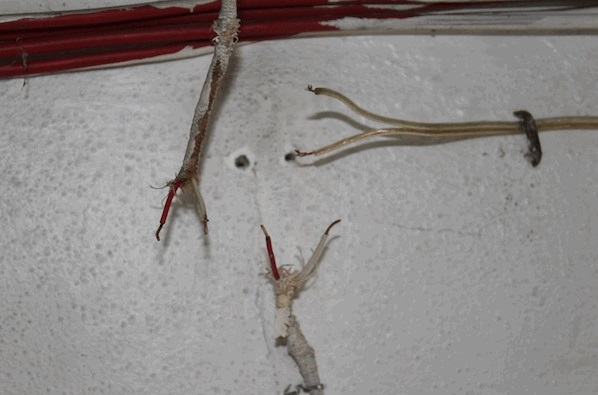
Модуль дисплея ATmega с датчиком отпечатков пальцев будет находиться снаружи, а плата управления с процессором ATtiny внутри гаража, поэтому чтобы передать сигнал потребуется провести через стену три провода: питания, заземления и сигнальный. Хорошо, когда в стене есть деревянный брусок, тогда не надо беспокоиться о дополнительной изоляции.
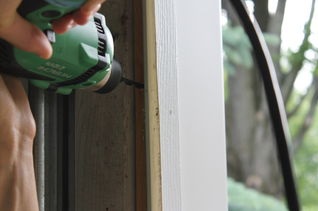
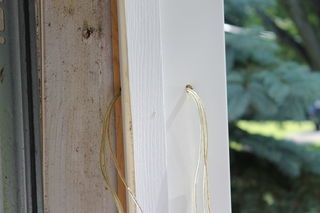
Наконец-то можно прикрутить собранное устройство к стене!

ПРЕДЫДУЩИЙ ЭТАП – Настройка сканера и программирование микроконтроллера
ДАЛЕЕ: Этап 11 / 12/ Тестирование
Рекомендуем:
 Биометрический замок – настройка сканера и программирование микроконтроллера
  GPS часы на Arduino
  Биометрический замок для гаражных ворот
  Биометрический замок – Схема и сборка ЖК дисплея
  Биометрический замок – сборка платы управления и программирование микроконтроллера
  Биометрический замок – тестирование
  Миниметеостанция на Arduino в телефоне
  Подключение RGB ленты через Arduino для управления с телефона


